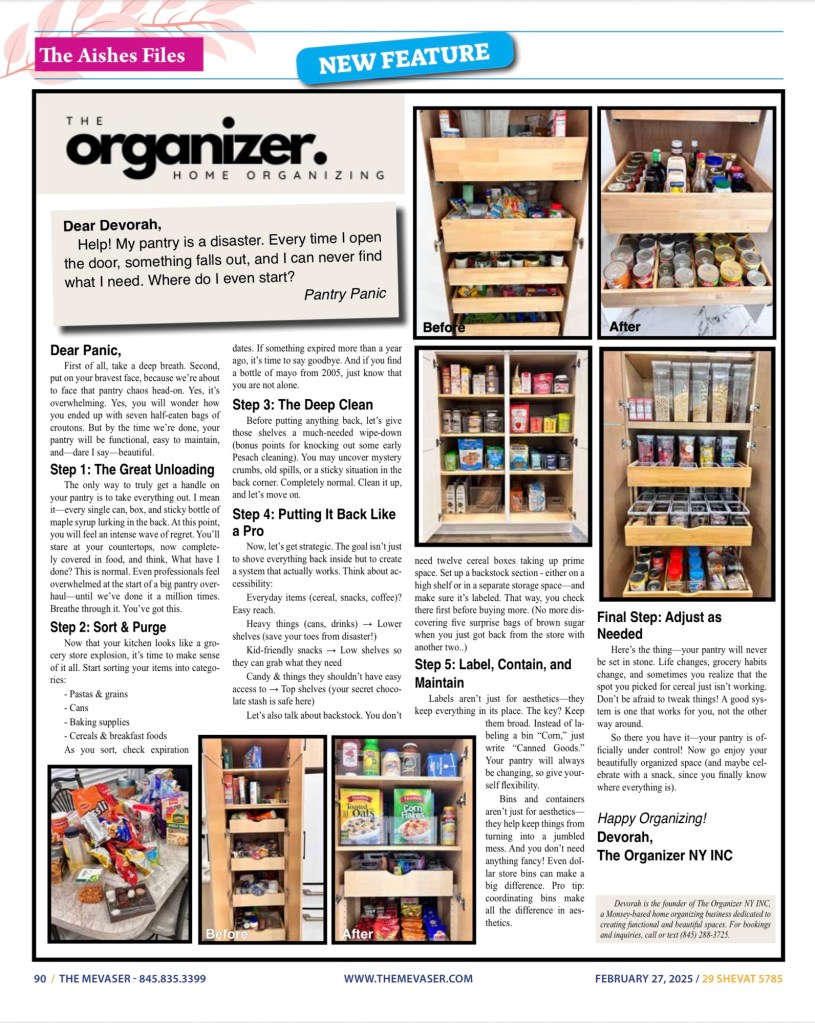
Dear Devorah,
Help! My pantry is a disaster. Every time I open the door, something falls out, and I can never find what I need. Where do I even start?
Pantry Panic
Dear Panic,
First of all, take a deep breath. Second, put on your bravest face, because we’re about to face that pantry chaos head-on. Yes, it’s overwhelming. Yes, you will wonder how you ended up with seven half-eaten bags of croutons. But by the time we’re done, your pantry will be functional, easy to maintain, and—dare I say—beautiful.
Step 1: The Great Unloading
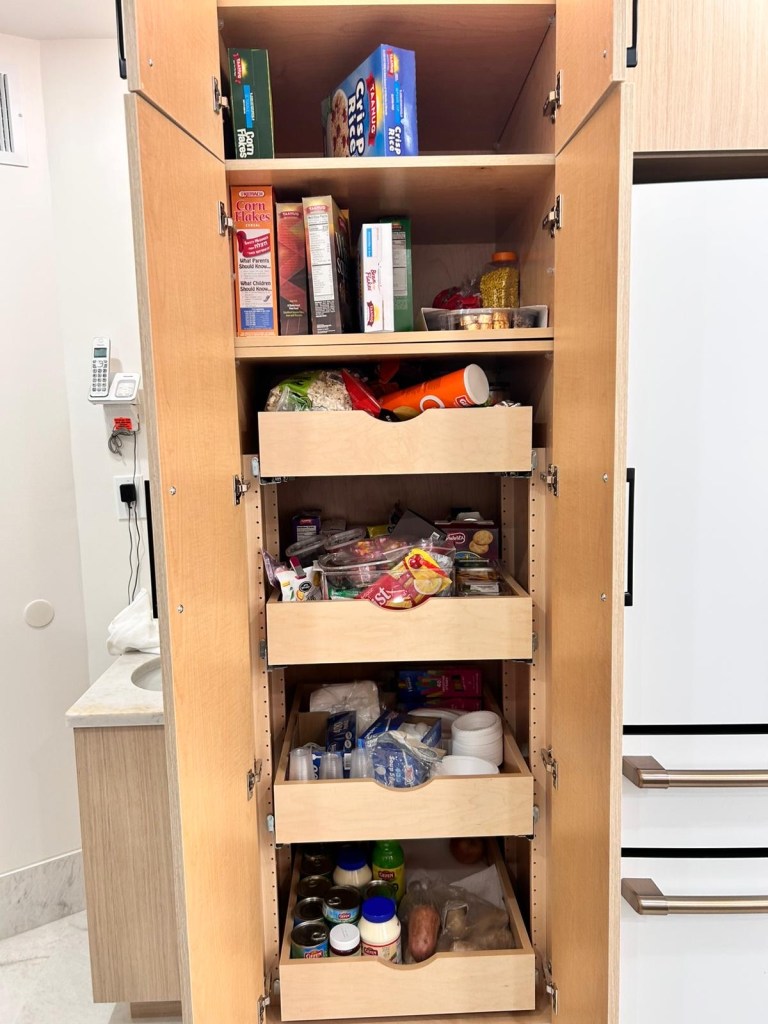
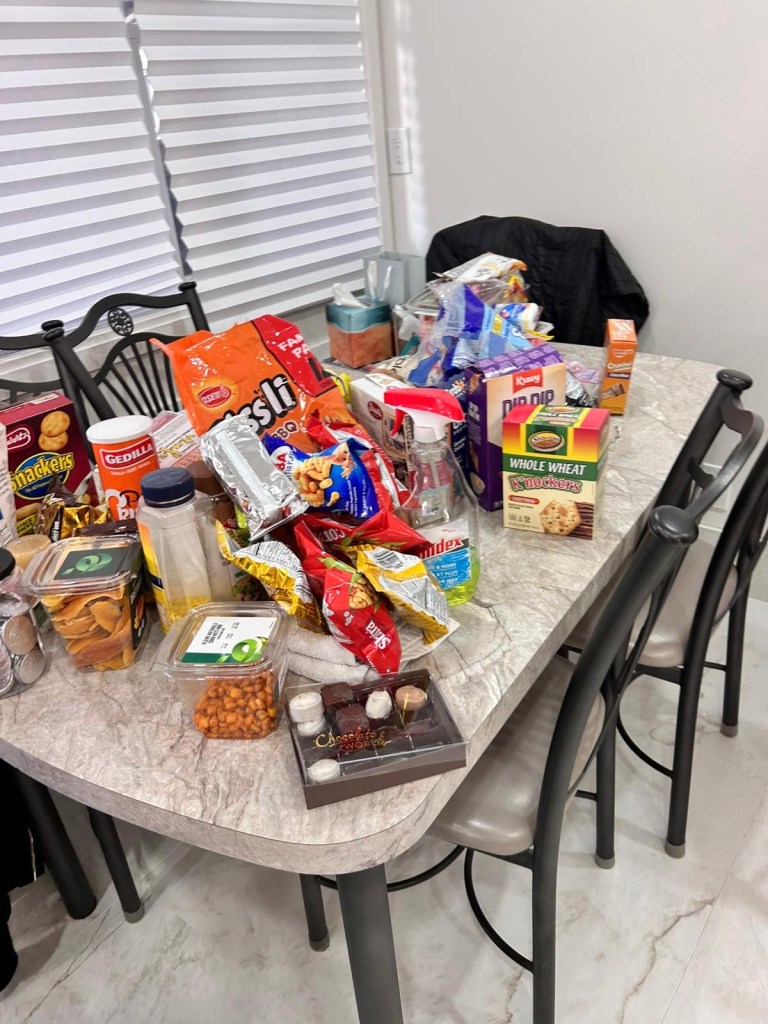
The only way to truly get a handle on your pantry is to take everything out. I mean it—every single can, box, and sticky bottle of maple syrup lurking in the back. At this point, you will feel an intense wave of regret. You’ll stare at your countertops, now completely covered in food, and think, What have I done? This is normal. Even professionals feel overwhelmed at the start of a big pantry overhaul—until we’ve done it a million times. Breathe through it. You’ve got this.
Step 2: Sort & Purge
Now that your kitchen looks like a grocery store explosion, it’s time to make sense of it all. Start sorting your items into categories:
– Pastas & grains
– Cans
– Baking supplies
– Cereals & breakfast foods
As you sort, check expiration dates. If something expired more than a year ago, it’s time to say goodbye. And if you find a bottle of mayo from 2005, just know that you are not alone.
Step 3: The Deep Clean
Before putting anything back, let’s give those shelves a much-needed wipe-down (bonus points for knocking out some early Pesach cleaning). You may uncover mystery crumbs, old spills, or a sticky situation in the back corner. Completely normal. Clean it up, and let’s move on.
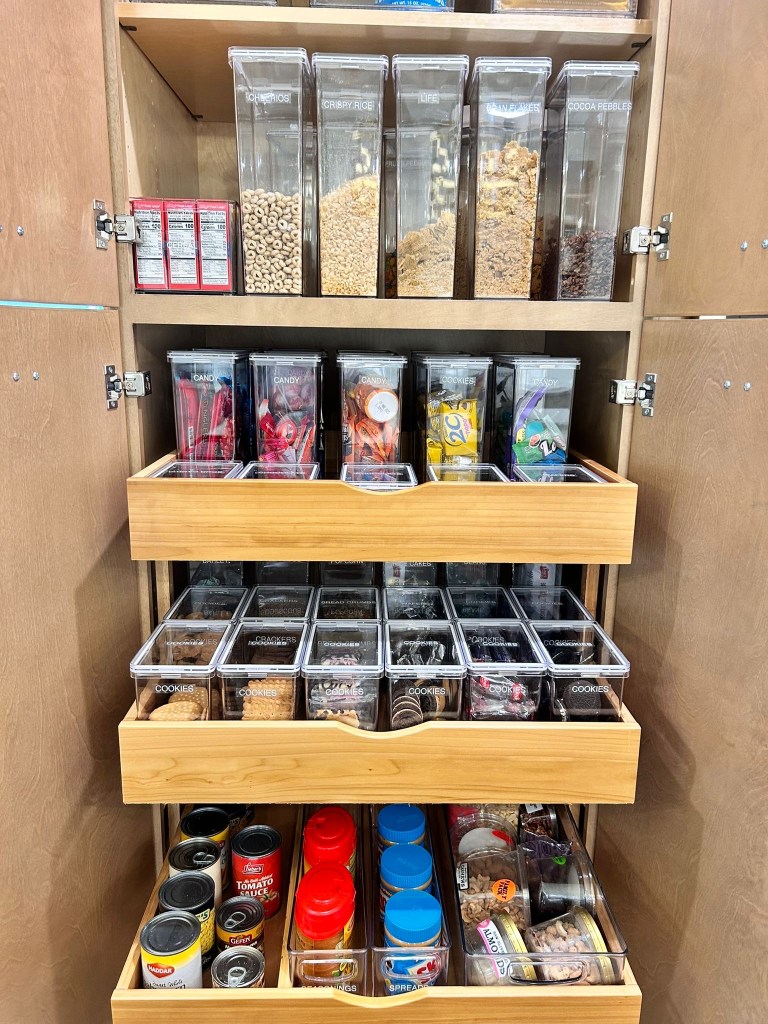
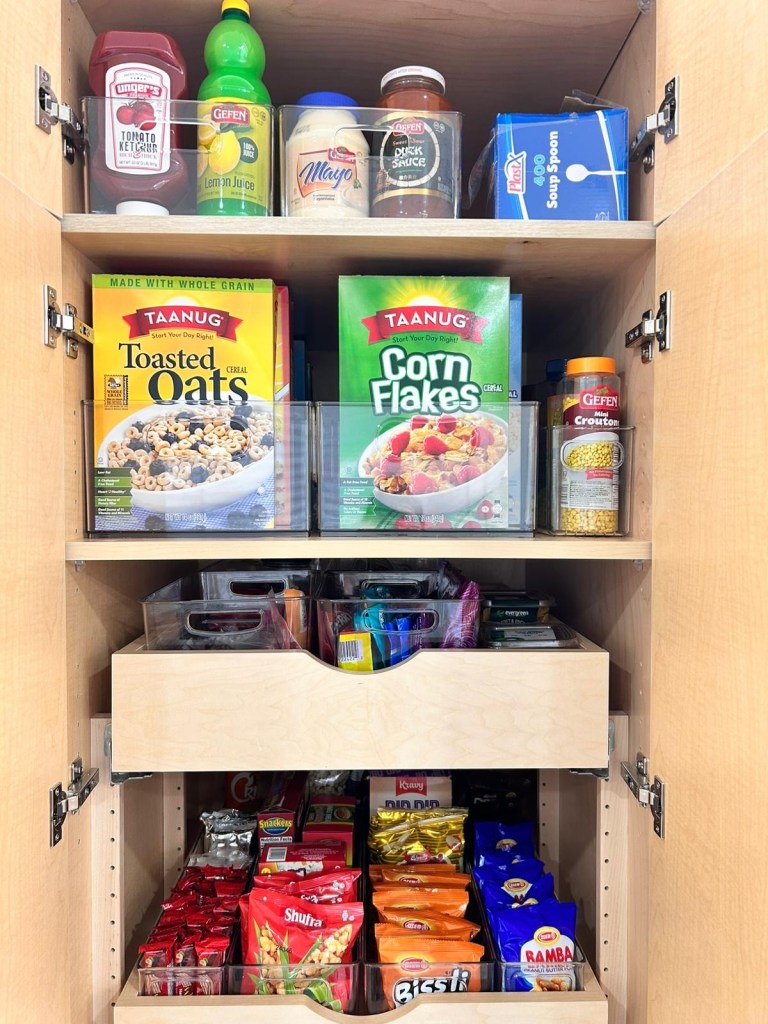
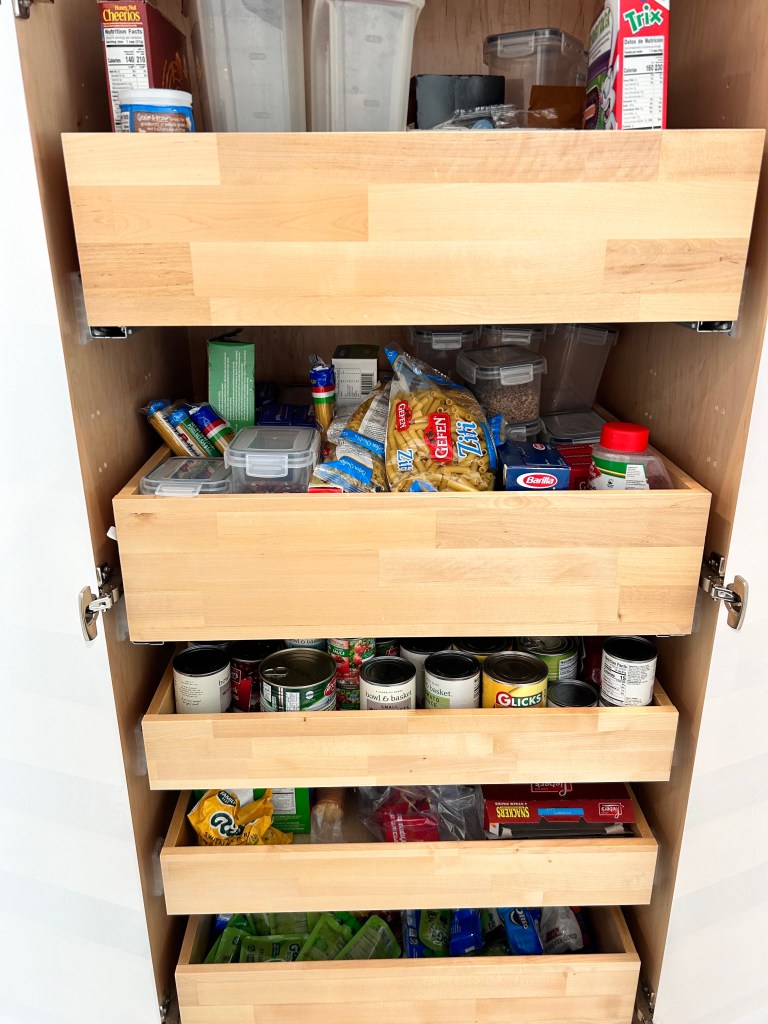
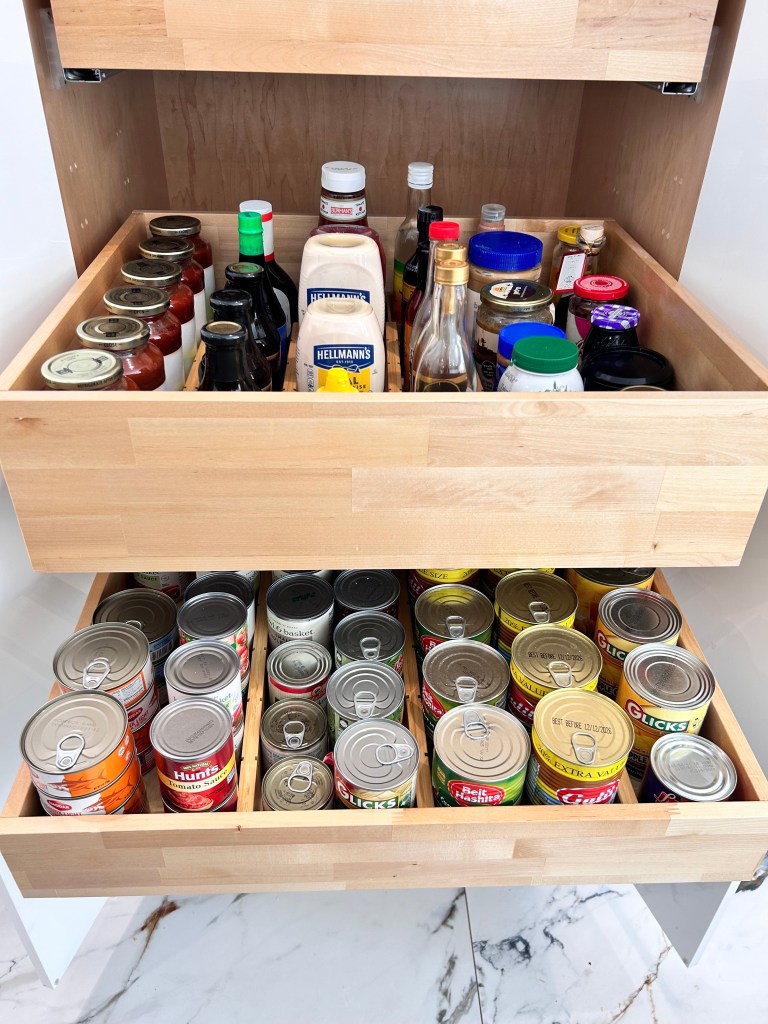
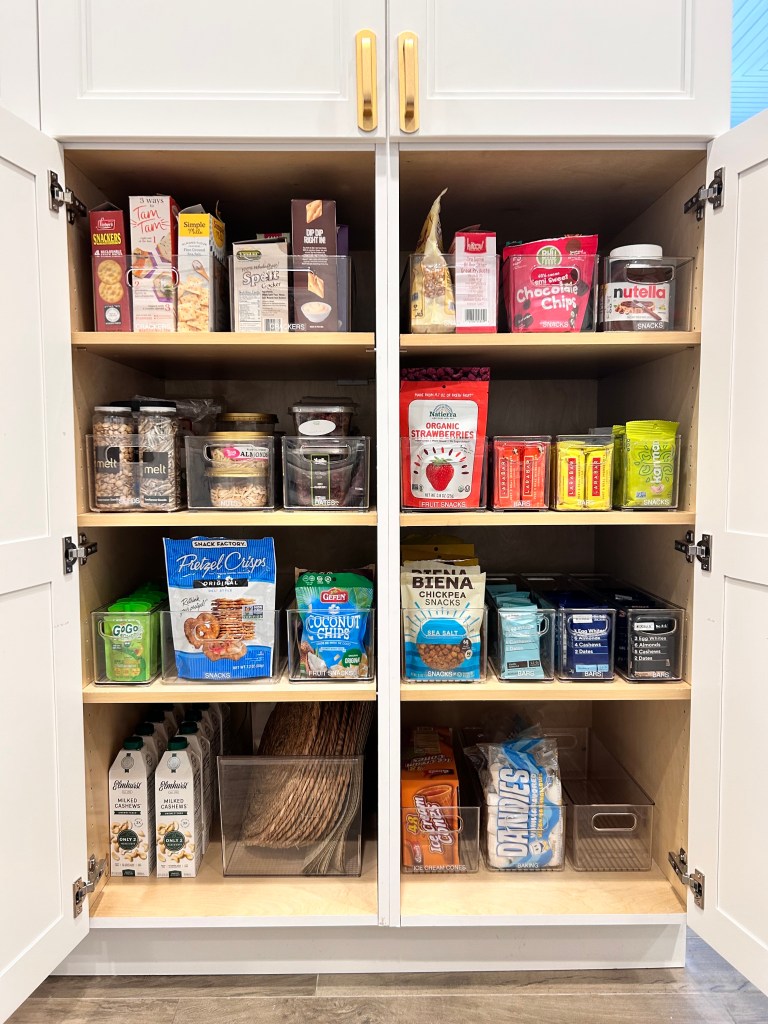
Step 4: Putting It Back Like a Pro
Now, let’s get strategic. The goal isn’t just to shove everything back inside but to create a system that actually works. Think about accessibility:
–
• Everyday items (cereal, snacks, coffee)? Easy reach.
• Heavy things (cans, drinks) → Lower shelves (save your toes from disaster!)
• Kid-friendly snacks → Low shelves so they can grab what they need
• Candy & things they shouldn’t have easy access to → Top shelves (your secret chocolate stash is safe here)
Let’s also talk about backstock. You don’t need twelve cereal boxes taking up prime space. Set up a backstock section – either on a high shelf or in a separate storage space—and make sure it’s labeled. That way, you check there first before buying more. (No more discovering five surprise bags of brown sugar when you already have plenty.)
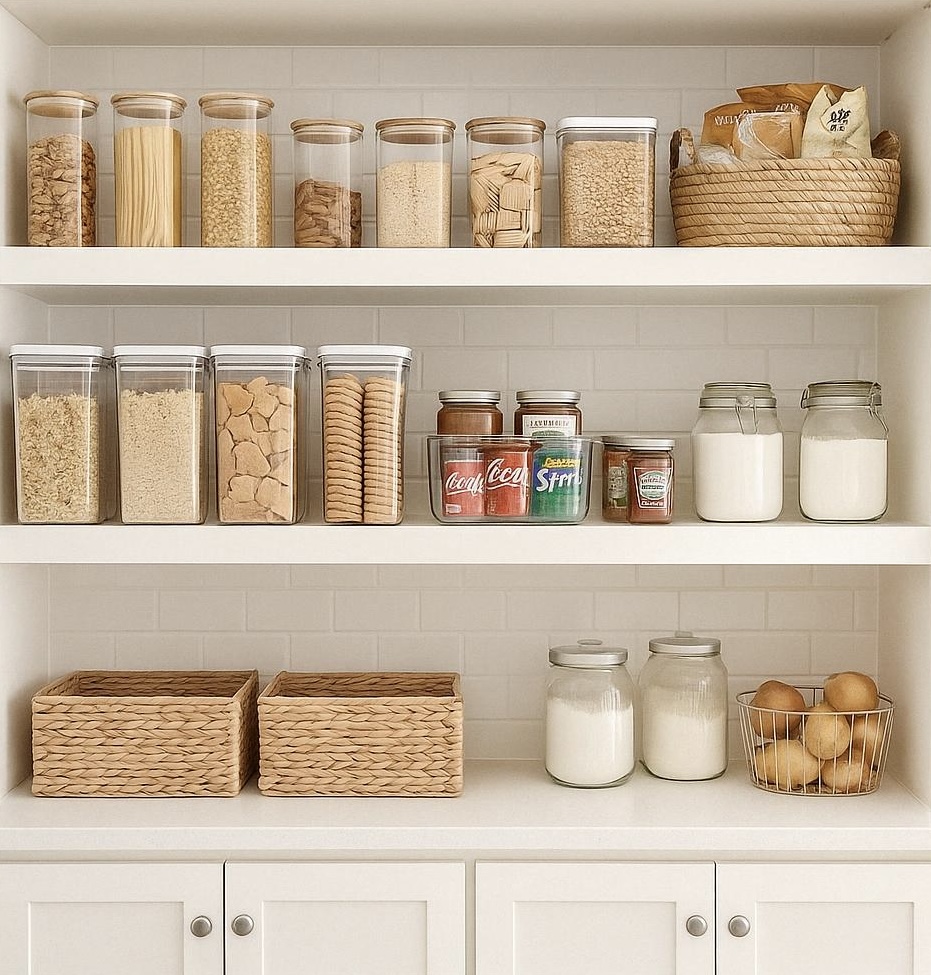
Step 5: Label, Contain, and Maintain
Labels aren’t just for aesthetics—they keep everything in its place. The key? Keep them broad.Instead of labeling a bin “Corn,” just write “Canned Goods.” Your pantry will always be changing, so give yourself flexibility.
Bins and containers aren’t just for aesthetics—they help keep things from turning into a jumbled mess. And you don’t need anything fancy! Even dollar store bins can make a big difference. Pro tip: coordinating bins make all the difference in aesthetics.
Final Step: Adjust as Needed
Here’s the thing—your pantry will never be set in stone. Life changes, grocery habits change, and sometimes you realize that the spot you picked for cereal just isn’t working. Don’t be afraid to tweak things! A good system is one that works for you, not the other way around.
So there you have it—your pantry is officially under control! Now go enjoy your beautifully organized space (and maybe celebrate with a snack, since you finally know where everything is).
Happy Organizing,
Devorah

Leave a comment